Hello, these are visual instruction on how to make shoes for an Obitstu doll. Patterns are available for sale at my Etsy shop. I will demonstrate a method of making shoes for your doll.
Etsy shop name: Ruffled Crenellations
https://www.etsy.com/ca/shop/RuffledCrenellations?ref=l2-about-shopname
Supplies used for shoes:
- paperboard
- thick quilting fabric (recommended)
- fabric glue
- a long stick or skewer with which to apply glue
- water-based Mod Podge
- scissors
- a drawing tool
- string and a thick embroidery needle
- paint and a paint brush
- a sharp, pointy sculpting tool for poking holes
- a doll to serve as a mold on which to shape the shoes
For younger crafters be sure to have adult supervision when working with sharp, adhesive or hot things.
Pattern pieces are numbered for ease of comprehension of sewing instructions.
Note: shoes made in example are roomy enough to fit a sock. If a more fitted shoe is desired, please adjust the sizes slightly smaller.
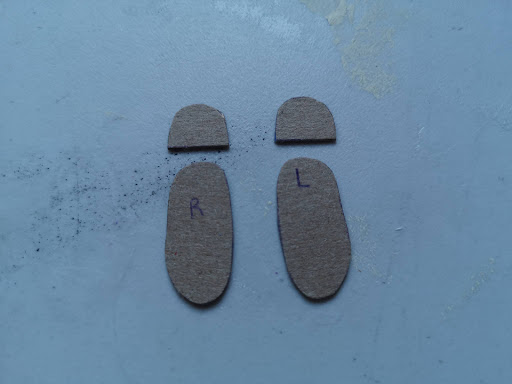
Trace insole and outsole along with heel pattern onto paperboard four times for each of these pieces.
Be sure to cut
4 for the right foot
4 for the left foot
and
4 for the heel
for a total of twelve pieces of paperboard. You will need all of them.
Stack and glue two of each matching piece together.
to have one set for the insole, another for the outsole and a set for the heels. You should have six thicker pieces of paperboard at this point.
Pick one left and one right to be the outsoles of the shoes. Glue the heels to what will be the bottom of the outsoles.
Allow the glue to dry and put the outsoles aside for now.
On the back side of a piece of scrap fabric that will form the tongue and toe puff of the shoe, trace two tongue with toe puff pieces. On whatever fabric you wish to be the part of the shoe that's showing at the sides and back, trace two shoe quarter pieces. Mark the centre lines of the numbered areas.
Cover all the edges excluding the darted ones with fabric glue that dries clear. Put the fabric pieces aside to dry for now.
Going back to the outsoles of shoes, paint the bottoms your desired colour and allow the paint to dry. The shoe outsoles in the example have been painted black.
Once the outsoles have dried, cover them with a layer of water-based Mod Podge.

Set aside the insoles to allow the finish to dry.
Now that the fabric glue is dry on the fabric pieces, we can cut the pieces out.
The fabric glue has given our pieces a crisp edge that won't fray. With all of the pieces ready, let's begin the next step.
14- Line up the toe puff centre marked 14 with the insole centre marked 14
like this.
Add glue only on the darts. Wrap the darts carefully around the bottom of the shoe, starting with the centremost dart and continuing with one dart on one side followed by a dart on the other side TAKING SPECIAL CARE to KEEP the LINE marked 14 LINED UP with the EDGE of the insole while doing so. This will provide the necessary slack in the fabric on the other side of the insole
to ensure a doll's foot will still have enough toe room to wear the shoe.
15- Line up the centre back quarter to the centre back insole.
Apply glue only to the darts and carefully wrap the fabric around the underside of the insole, once again taking care to KEEP the marked line LINED UP with the EDGE of the insole, though this time one side of the fabric quarter is applied at a time. After the first side has been secured
the result should look like this.
Now do same for the other side of the fabric
and allow the glue to dry.
Put a tiny bit of glue on inside of tabs that are sticking out,
fold them in and allow the glue to dry.
Making sure the right outsole matches up to right side shoe,
glue the raw side of the outsole to the bottom of the shoe.
Allow the glue to dry.
Now repeat the process for the left shoe.
I put the pieces on the doll's feet to make sure they fit well and that they are roomy enough for stockings.
Now it's time to add some detail.
Using paint, I paint small circles to serve as eyelets on both sides of the shoes, making sure they are as even as possible on both sides by lining them up for reference.
Allow the paint to dry.
Once the paint is dry, use a sculpting pick or other thick sharp tool to poke holes through the centres of the circles of paint.
Cut two long pieces of string for each shoe. Use an embroidery needle to pass the string through the eyelet holes.
Lace them up and we're done!
The pattern for these pink shoes is a little smaller and is included with the pattern printables at my Etsy shop!


No comments:
Post a Comment