Hello, these are visual instructions on how to make a blouse for a 27cm Obitsu SBH small bust doll body. Patterns are available for sale at my Etsy shop. I will demonstrate how to make the blouse for a cute three-piece outfit complete with accessories for your doll.💖
Etsy shop name: Ruffled Crenellations
https://www.etsy.com/ca/shop/RuffledCrenellations?ref=l2-about-shopname
Basic sewing skills and knowledge of terminology are recommended for use of this pattern.
Note: this pattern does not have seam allowance, be sure to add some before cutting the pieces out.
Patterns will be available at my Etsy shop soon as they are ready.
Supplies used for shirt (blouse):
- a needle & thread
- some pins
- sharp sewing scissors, big and small
- a drawing tool
- thin cotton fabric
- thin cotton lace
- fabric glue
- a stick or skewer to spread glue across fabric
- snaps or velcro
- ribbon
For younger crafters be sure to have adult supervision when working with sharp or hot things.
Note: Add seam allowance to all pieces excluding the panties, skirt, skirt ruffle, shirt yoke and all shoe pieces.
Hand-stitching is recommended.
Pattern pieces are numbered for ease of comprehension of sewing instructions.
The final piece: the blouse
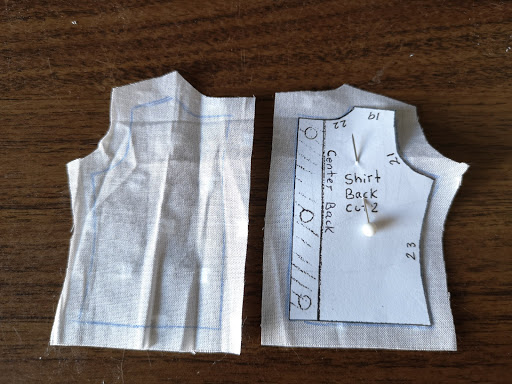
Trace the shirt front pattern on the back side of a piece of fabric and cut it out, leaving seam allowance.
Then trace both of the pieces for the shirt back, leaving seam allowance.
19- Good side to good side, sew with a backstitch on seam line 19 for both shoulder pieces.
It should look like this when sewn
Then cut out two pieces for the sleeves, leaving seam allowance.
Cut two pieces for cuffs and fold them in half with their good sides facing out.
Note: I drew a visible seam line to guide where to sew for the tutorial.
20- Line up sleeve seam line 20 with the open raw end of cuff 20, find the centre and pin them good side to good side.
Back side view
Right side view
20- Gather the sleeve with a straight stitch and pin across the cuff.
20- Flip to the other side and sew across on the drawn seam line
20- like this.
Now take the pins out and flip the cuff up so the raw edges will be hidden inside the sleeve.
Right side view
Back side view
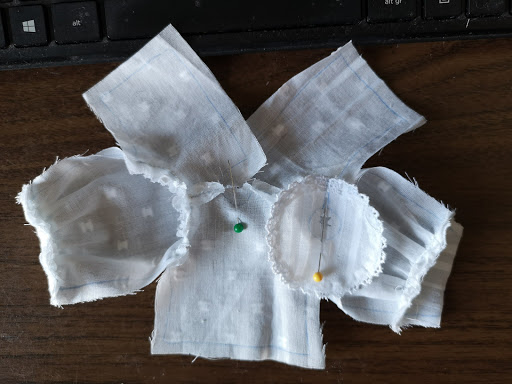
21- Next, we are going to pin the sleeve to the centre shoulder, good side to good side. Gather and line up piece 21 to 21 and sew
21- like this.
A view of the back when it's flipped over
21- On the back side, gather and pin the sleeve to the arm hole and sew.
I use a straight stitch to gather and then a backstitch when sewing to keep the very thin fabric I'm using from fraying.
A view from the other side
21- Like this.
A view of the right side
21- Now repeat the process for the other sleeve.
A view of the inside
A view of the outside
Put the piece aside and continue to the next step.
22- Cut out the circle yoke piece. Draw a circle at the neck hole and a line to demark the line at the narrowest part that will function as the opening at the back of the shirt.
Flip the yoke piece over to its back side and brush fabric glue on the fabric where the line is drawn. Allow the glue to dry.
When the glue has dried, flip the yoke piece back over to its good side and cut on line. The glue will prevent the fabric from fraying.
Glue or sew lace along the edge of the yoke, giving time to allow the glue to dry if you chose that method.
Cut darts on the inside of the hole drawn on the yoke. Be sure not to cut too close to the line.
Mark the centre front of the shirt and yoke with pins.
Line them up good side of yoke to back side of shirt.
22- Making sure the drawn seam line on both pieces match up, pin and sew on the small round seam line 22 on the yoke.
Which ought to end up looking roughly like this.
Flip the piece over to the other side.
22- Carefully cut darts around the neck hole facilitating the ease of turning the yoke (shirt collar). Turn the yoke out and have it lay flat.
After turning the collar out, pin it down.
Flip it to its back side, dart and turn the seam allowances.
The yoke does not reach all the way to the centre back pieces on both sides, so cut darts on the seam allowance and fold them in.
Turn it back around to its front and sew with a backstitch along the edge of the neck hole
which should look like this.
A close-up view
A view of the back
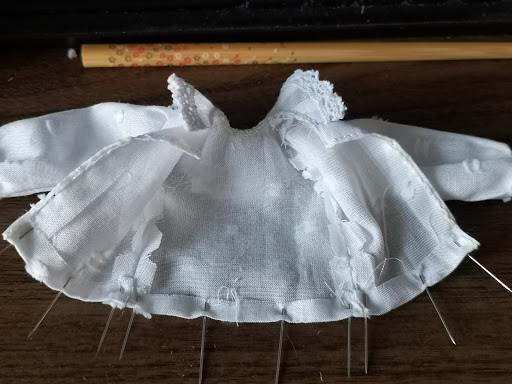
23- With the back side out, pin all sides of shirt seam lines 23 and sew them
like this.
Flip the shirt over and turn it right side out.
It's looking nice
Flip it over to its back.
Turn the raw centre back seam allowance in, creasing along the seam line. Pin it into place.
Repeat for the other centre back side.
With everything all pinned into place, use a backstitch to make the edges look neat and tidy
like this.
For the bottom of the shirt, I do the same: fold the seam allowance in, creasing on the drawn seam line and pinning it into place.
Then sew with a backstitch along the bottom edge.
Add one snap or piece of velcro to the upper back of the shirt, as the rest of the shirt will be tucked in underneath the bodice and skirt.
Add a fancy bow to the front and its all done!


